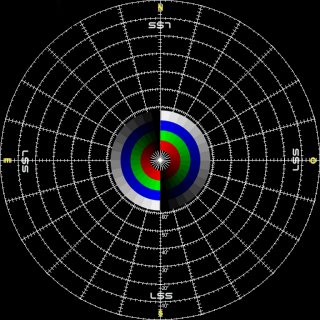
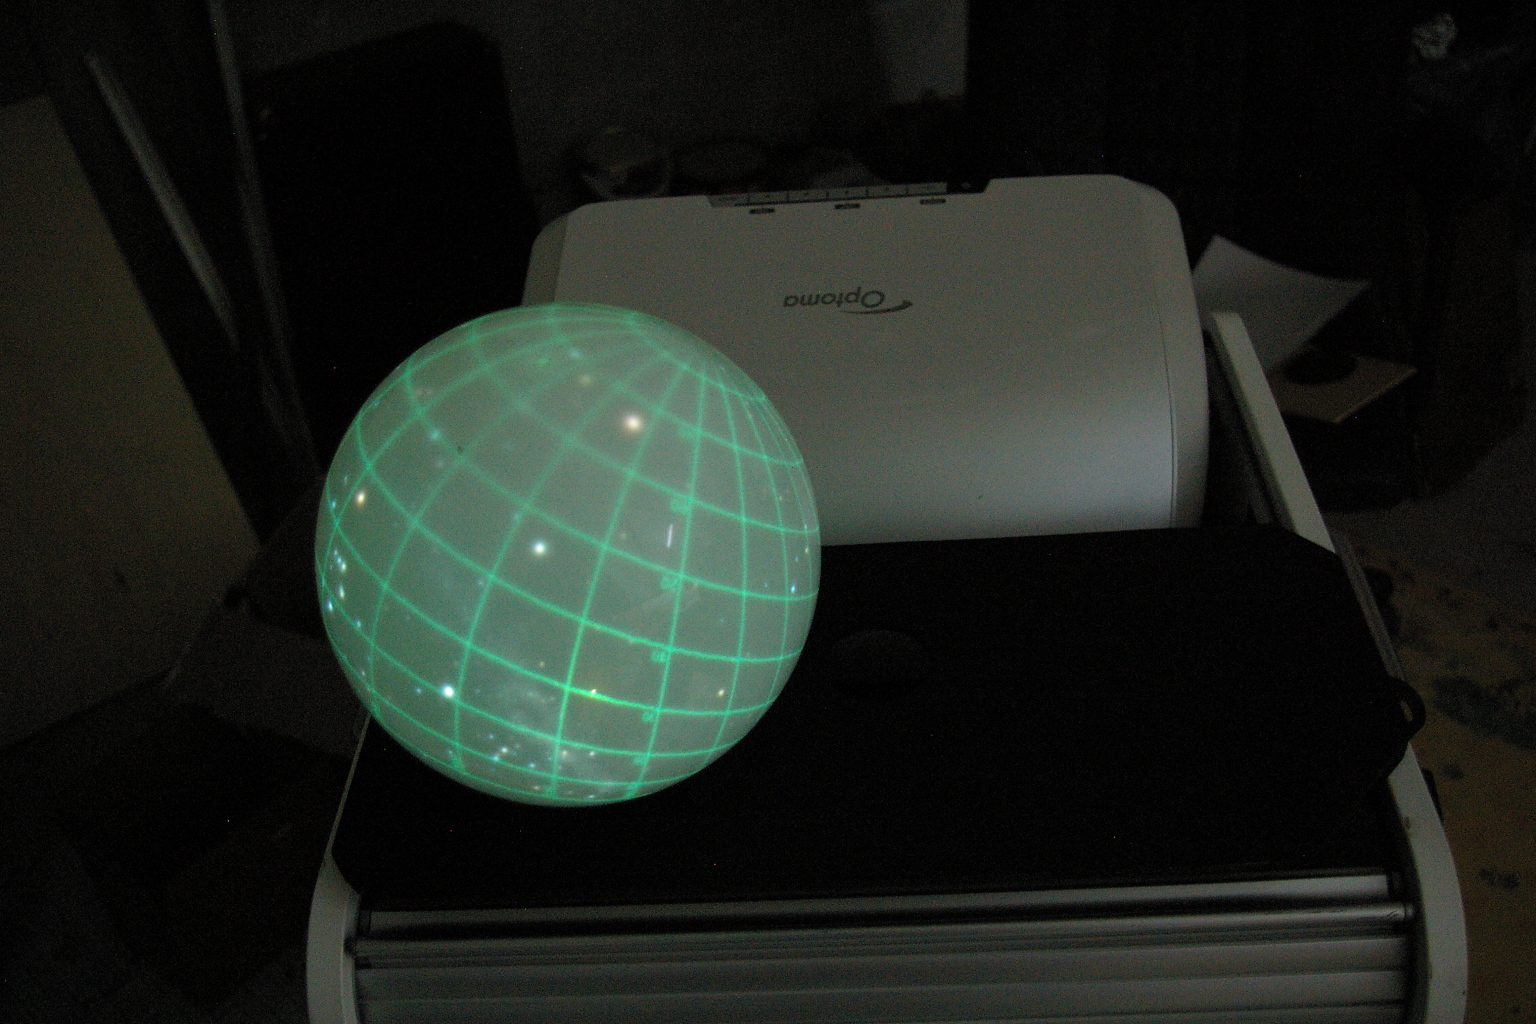
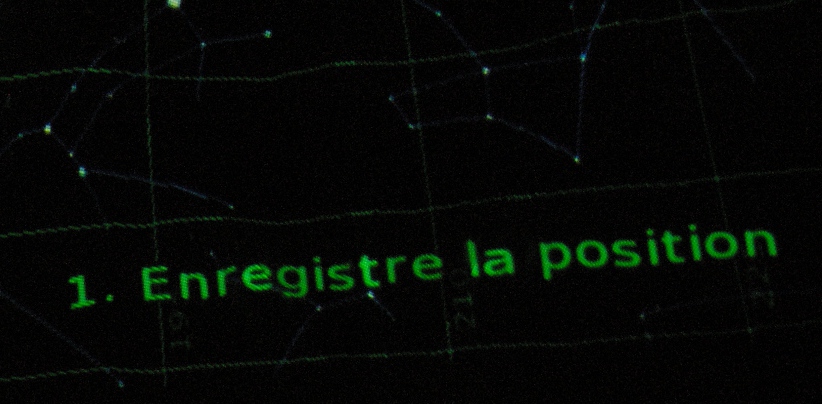
PATTERN ADJUSTMENT
To
master the adjustment of the optical
systems, it is recommended to have the following pattern perfectly
contrasted
to get the best focus on all parts of the dome and also correct the
tilt/brightness/contrast/color
of the image.
Version 1080x1080
- 1200x1200
- 1600x1600 - 1920x1920 - 2160x2160
- 2560x2560
OPTICAL
ADJUSTMENT
Horizontality
of the projector
Because
of the DLP technology and
the need of most classical projection rooms, the image is not centered
in the lense axis causing the image to be projected with an angle. To
correct
this in our case, the rear of most projectors should be raised to
project
horizontally. With some projectors, tilt corrections can be diminished
with mechanical levers or software adjustments.
Project
on a small screen as a reference.
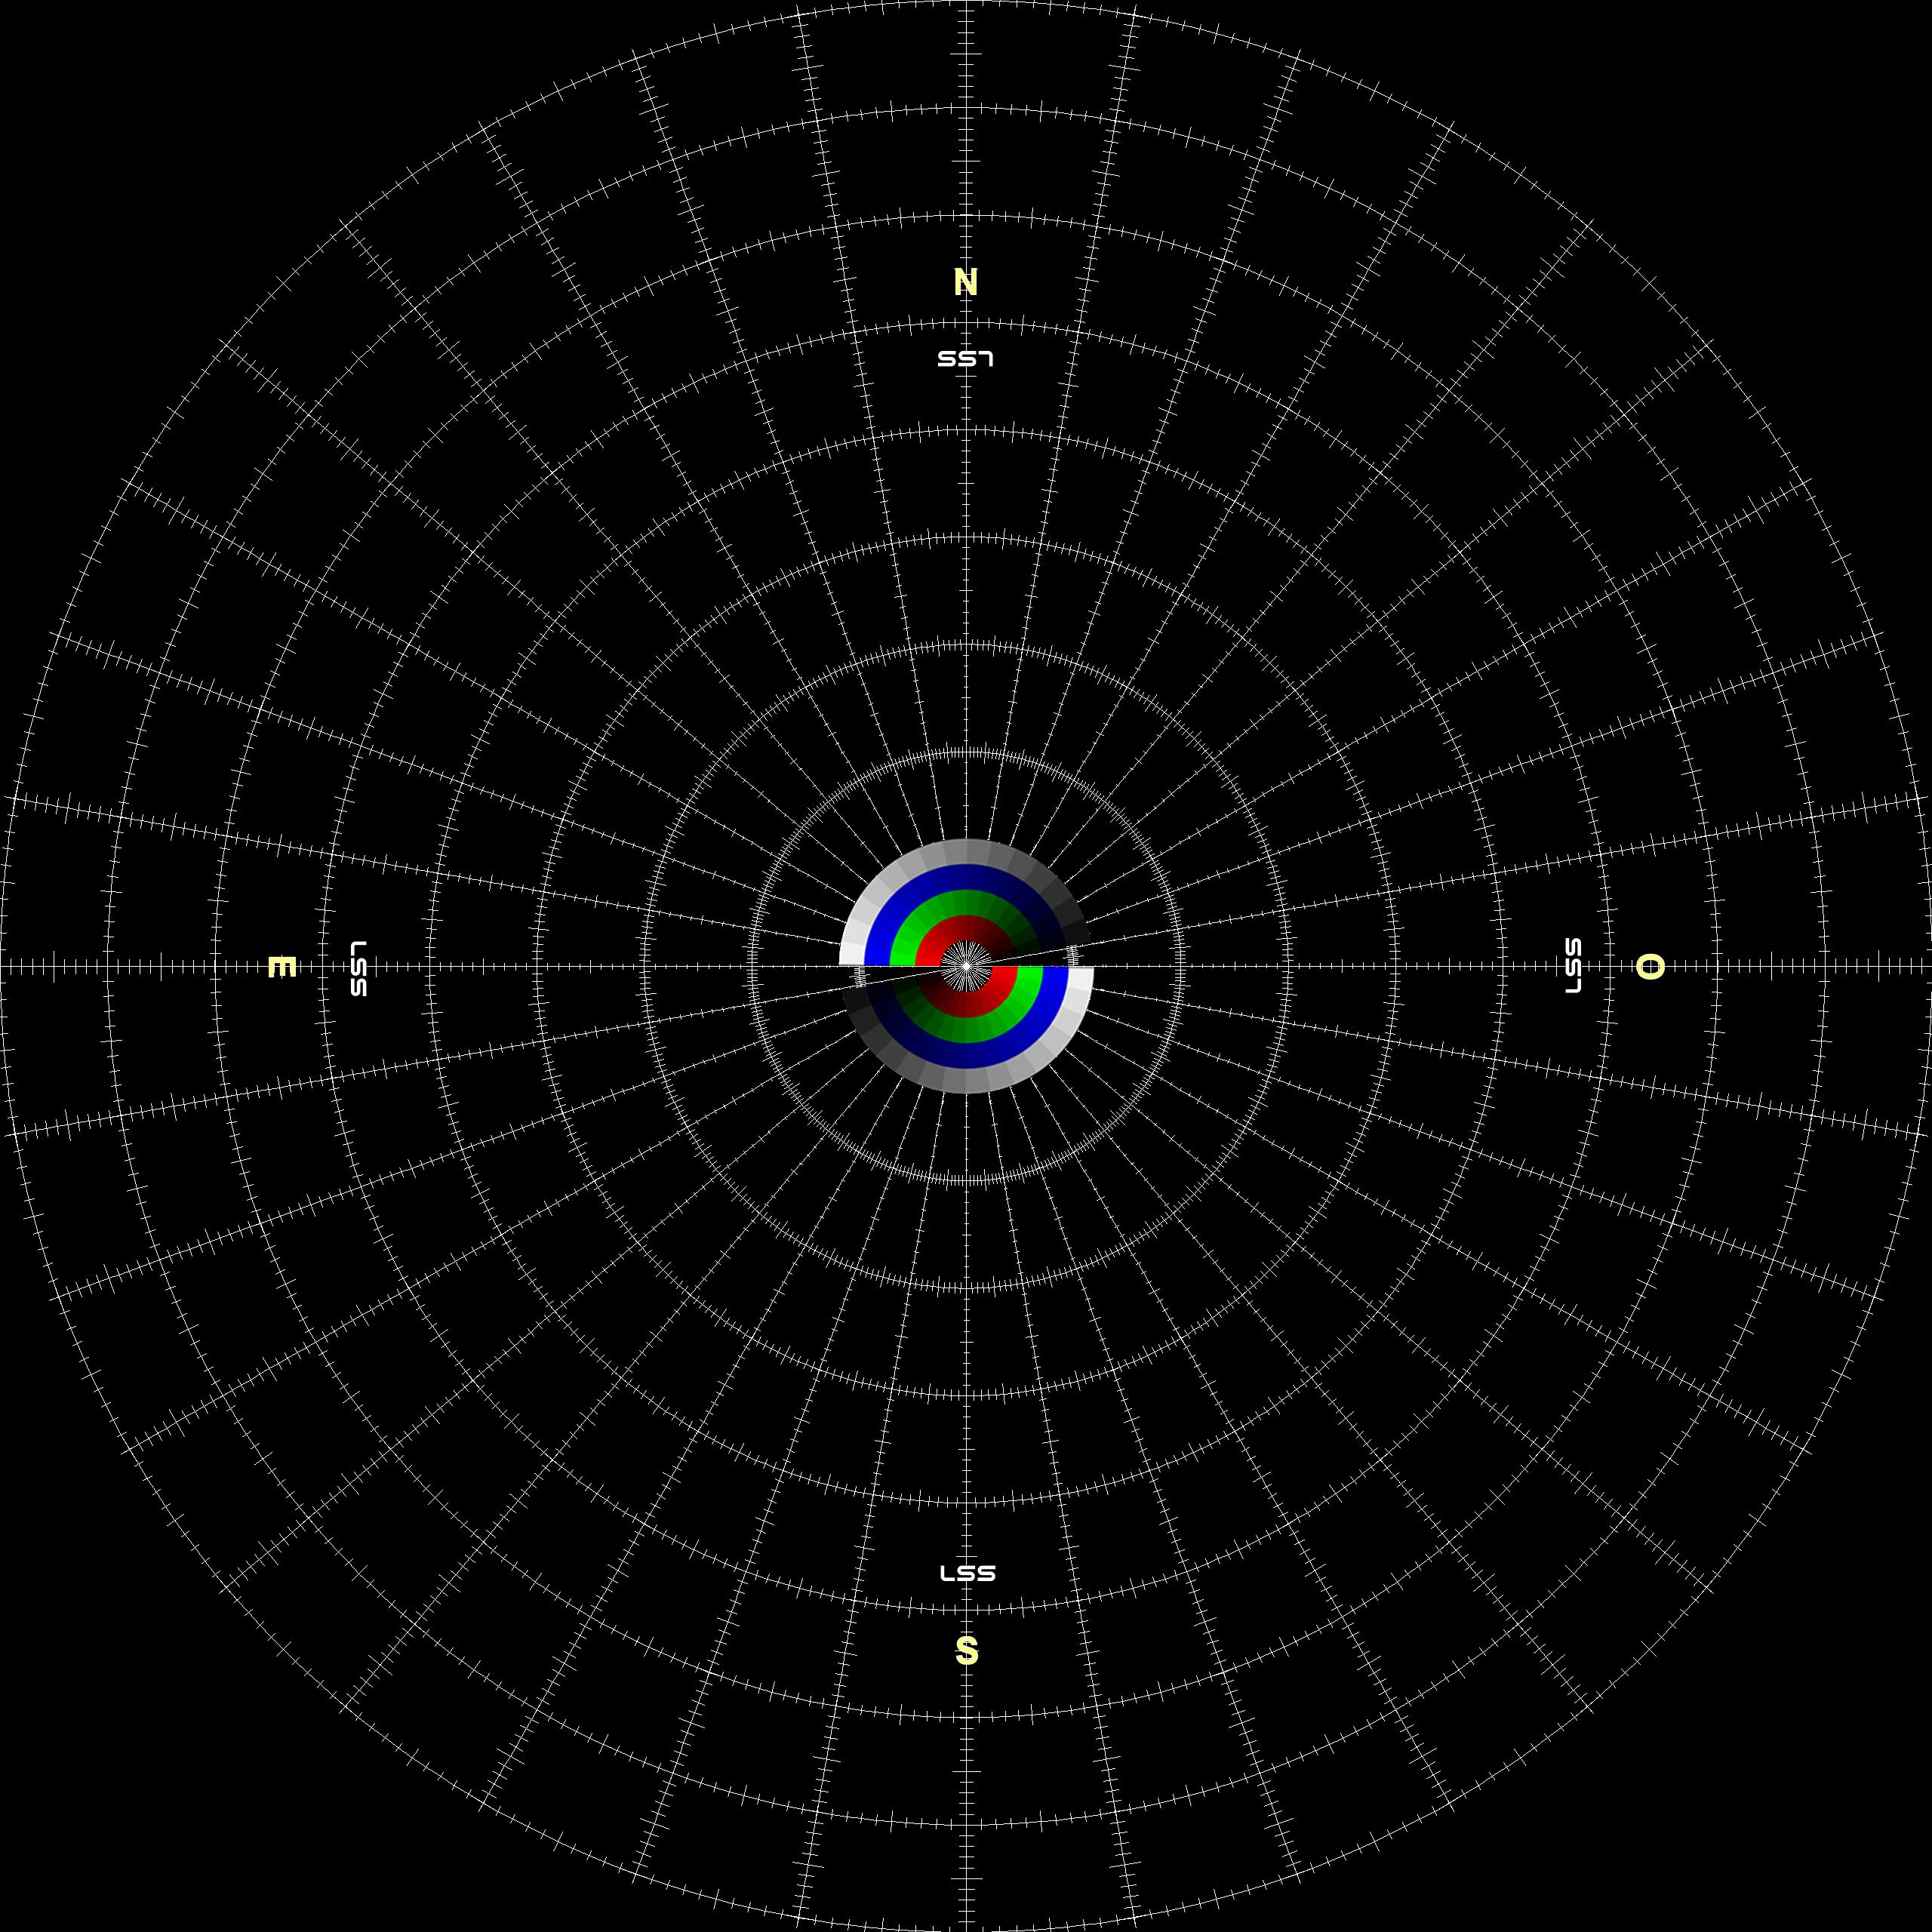
Put the altazimuthal grid and compass cardinal points on and suppress
the
atmosphere in Stellarium360. By moving the screen, the image should
zoom
in or out but the center and the E/O points must remain on the same
line.

If
this isn't the case, adjust by
tilting the VP, for example in using the adjustable feet.
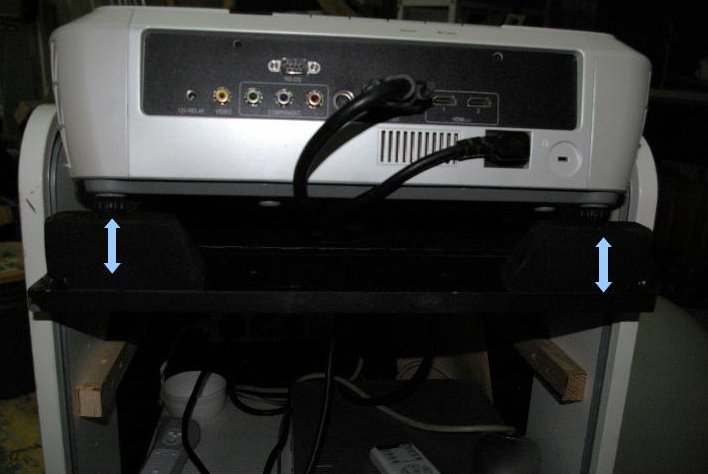
Height
blocking
Adjust
the height of the block so
that the circular image is formed at the center of the lens. Warning,
the
four legs must be at the same height to avoid creating extra angle.
Using
a bubble level for horizontality can be useful.
You
can use a paper, masking with
it half of the lens to see if the circular image is perfectly centered
with the optics.
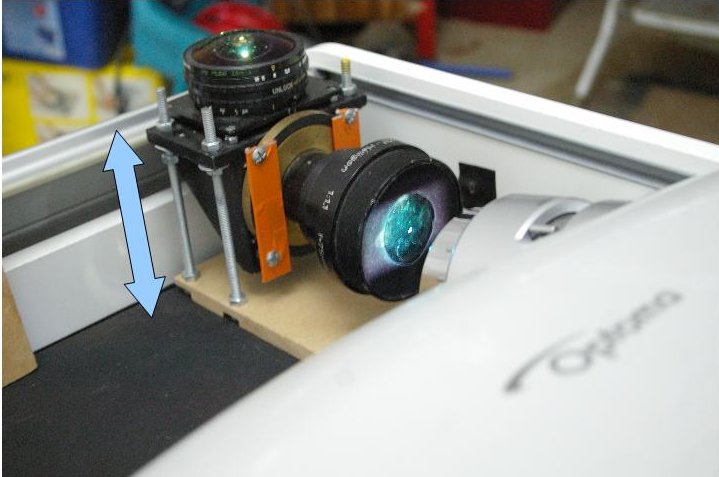
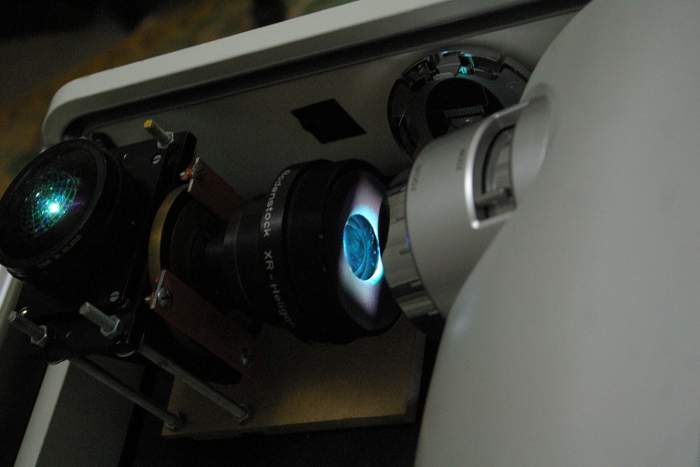
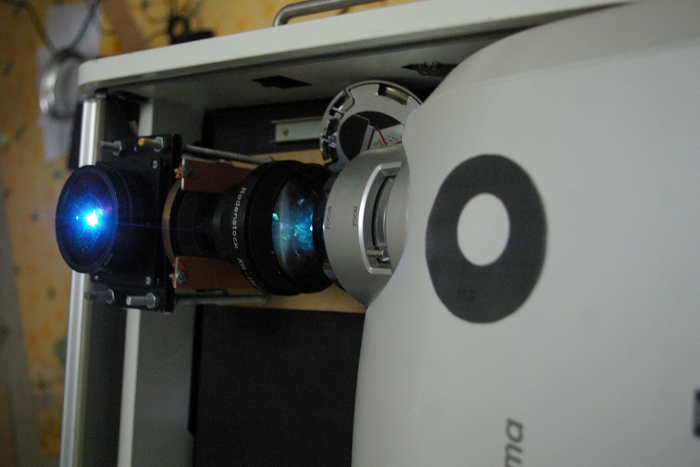
Block
placement
Depending
on the type of Heligon
or the camera lense, you'll have to put the block close to the
projector.
For others, you'll have to adjust the distance (between 10 and 15 cm
for
some Heligons). Try as much as possible to remain in the optical axis.
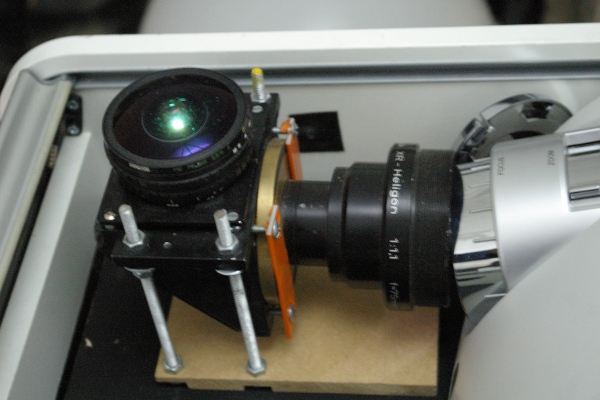
Horizontality
of the block
When
you place the optical block,
most of the time it isn't aligned. The result is a staggered pattern
onto
the dome. You can help the adjustment with a translucent bulb for the
setting.
For
fine adjustment, the easiest
way is to gently move the projector to perfect alignment: Left / Right
Rotation for the horizon I / O, up and down to the horizon N / S
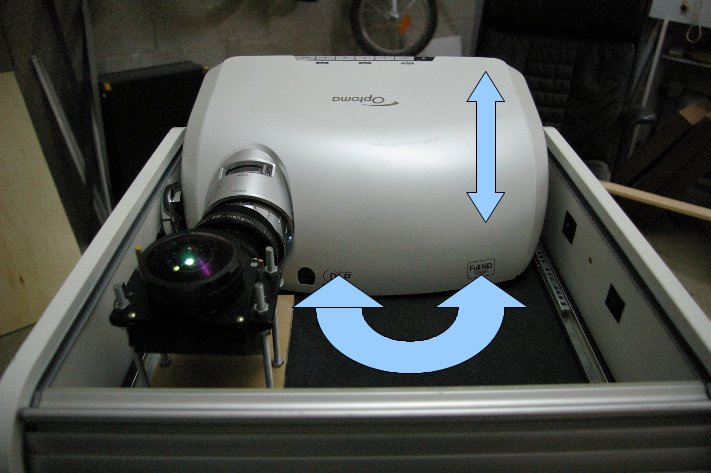
You
must get something like this
in the end...

Centering
the projector in the dome
It's
uncritical to be slightly shifted
from the center of the dome. If the offset is too important, some parts
of the picture will appear brighter than other parts (the side the
projector
is close to).
Troubleshooting
According
to the optics, you will
discover that you have sometimes to cheat and reach a compromise,
otherwise
the edges will be sharp but the zenith will be blurred or sometimes
only
one side of the horizon. It's due to spherical aberration of the lenses.
Two
options: use a diaphragm or more
radically change optical elements for something better.
A
basic rule: always check the horizon
in front of you, not just on the horizon to your left or right.
Sometimes
the image appears blurred on one side, but when you shift to the
opposite
way, the sharpness becomes acceptable.
Limitation
of
aberrations with a baffle
Image
Enhancement
Even
with a Heligon condenser, the sharpness control on the entire image can
be difficult. Most of the time, the horizon is sharp for 3 points of
the
compass (N, E, O), but not the last (southern). By changing the
alignments,
it merely shifts the problem.
Without
baffle
By using
a Baffle at the entrance of the condenser, it's possible to improve the
quality of the projection. Of course, you lose (a little bit) in
brightness,
but most projectors are almost "too bright", so a small loss is
acceptable
(you can compensate by setting up the level of intensity of the
projector).
 with
Baffle with
Baffle
Parameters
to
adjust
- Diameter:
72 mm
- Diameter
of the central opening: 30
mm
- position
of the center: +4 mm high
|
|
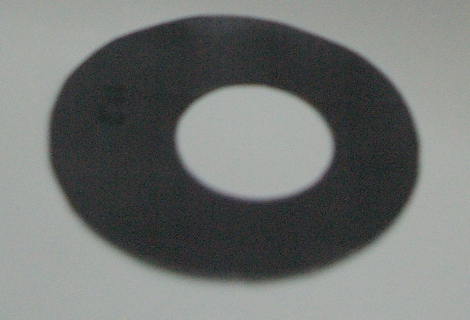
How to
build a
Baffle ?
With
Open Office Draw, it's very easy to generate a page with circles of
various
sizes. Just change the properties of the inner circle: diameter and
center,
and print it all. For those not fluent software, here are some PDF
files
of Baffles.
Centered
Baffle: Download
Uncentered
Baffle : Download
Then
cut each drawing with scissors, following the best circular
curvature.
Experiments/
Process
control
1.
The optical beam must be nearly
centered with the Heligon. The development must be done on the dome at
the peak, using the grid altazimuth.
2.
Using a centered Baffle, we get
a clear picture on the horizon initially unclear, but the opposite
horizon
is then partly hidden. Make several trials with different sizes to
determine
the minimum diameter (5 mm). With Stellarium360, the grid will be
visible
on altazimuth 360 at height 0 (do not forget to remove the landscape
and
atmosphere). On the system used by the Bressan's planetarium, the ideal
diameter is 30 mm.
3.
Without the baffle, Try by successive
tests the gray area to the southern horizon. To facilitate future
adjustments,
also display the menu M and alignment of constellations.
4.
Gradually decentralize the Baffle
up to try to determine the offset necessary. on Bressan's Planetarium,
this offset is 4 mm.
5.
With appropriate software (eg
open office), make some copies with different offsets (center opening
offset).
6.
If one of the Baffles is satisfactory,
the double-felt-to stiffen, and avoid stray reflections.
Example
of projection horizon south-south
west
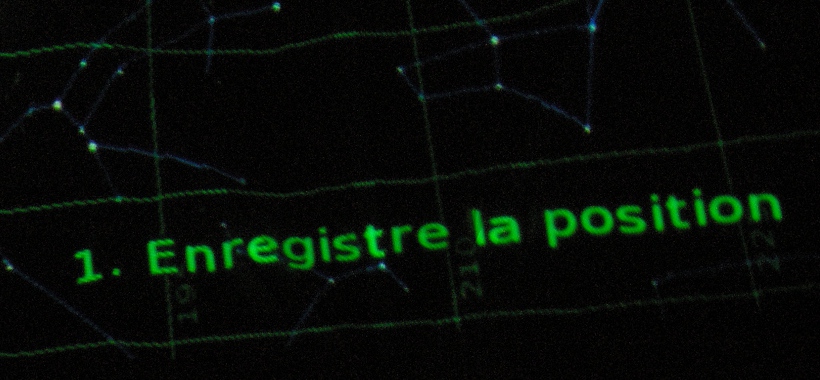
The
southern horizon is slightly
blurry, the menu text "drools", the stars are imbedded.
With
the baffle, the text is clearer,
the stars are less drooling.
Yves
LHOUMEAU
|

